| 📦good-food | |
| ┣ 📂assets | Any file that the app need at runtime, contain all static image files, icons, animations, fonts |
| ┣ 📂components | Contain all components shared between screens, all applications, reusable and UI components |
| ┣ 📂contexts | Context is designed to share data that can be considered global to a component tree |
| ┣ 📂navigation | Contain all stack navigators, to manage the navigation history and presentation of appropriate screen |
| ┣ 📂node_modules | Directory created by npm and a way of tracking each installed packages. A cache for the external modules |
| ┣ 📂redux | Contain reducers, actions , state container, a store to store the state of the variables |
| ┣ 📂lang | Translations for your specific language, regions |
| ┣ 📂screens | contain all screens of app, components can be handled by some navigator |
| ┣ 📜.gitignore | Specifies untracked files that git should ignore. Files already tracked by git are not affected |
| ┣ 📜App.js | Main component, which acts as a container for all other components . |
| ┣ 📜README.md | Contain information that is commonly required to understand what the project is about |
| ┣ 📜babel.config.js | Run plugins on a subset of files, convert syntax into code that can be run in javascript environment |
| ┣ 📜data.js | Contain some data use by many components in all app |
| ┣ 📜firebase.js | Contain firebase configuration, functions, interactions with database, all firebase services |
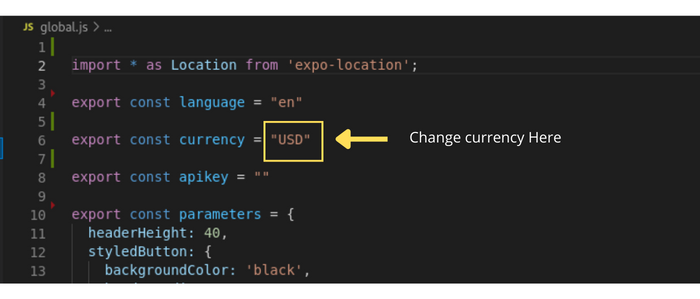
| ┣ 📜global.js | Contain all variables used in app globally, constant, currency, global style, api keys, language ... |
| ┣ 📜package.json | Manifest file for app, metadata associated with project + all dependencies with version + scripts |
| ┣ 📜utils.js | Contain all util functions , geolocation, distance between points, generate uid ... |
| ┗ 📜yarn.lock | Manage and list the versions of dependencies that are used at the time of the installation process |
Setting up the development environment
This page will help you install and build your first React Native app.
If you are new to mobile development, the easiest way to get started is with Expo CLI. Expo is a set of tools built around React Native and, while it has many features, the most relevant feature for us right now is that it can get you writing a React Native app within minutes. You will only need a recent version of Node.js and a phone or emulator. If you'd like to try out React Native directly in your web browser before installing any tools, you can try out Snack.
How to Install Node.js and NPM on Windows
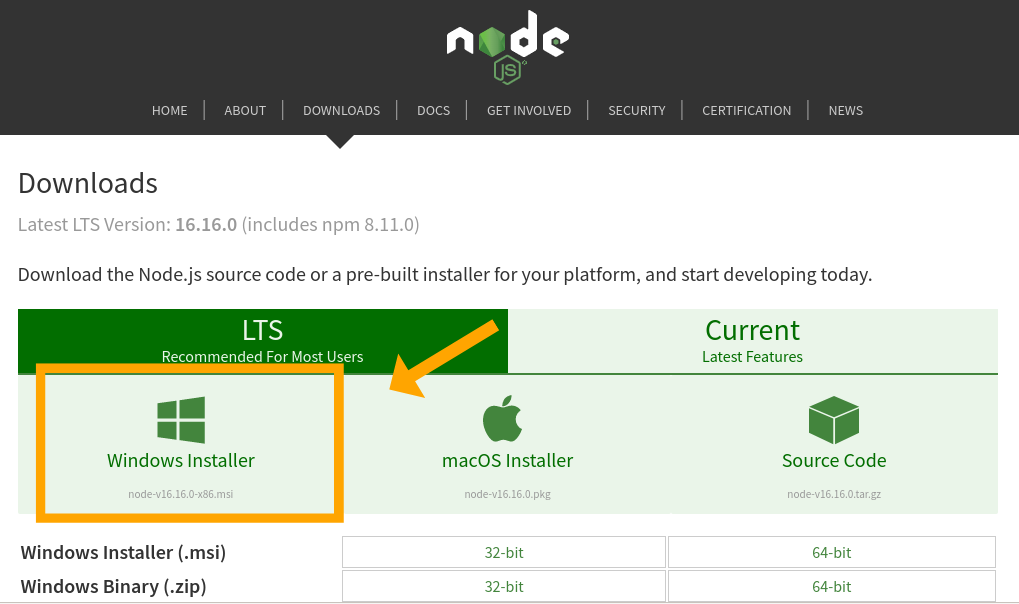
Step 1: Download Node.js Installer
In a web browser, navigate to https://nodejs.org/en/download/. Click the Windows Installer button to download the latest default version. At the time this article was written, version 16.16.0-x64 was the latest version. The Node.js installer includes the NPM package manager.
Installing Node.js on macOS follows almost the same procedure as on Windows. All you have to do is download the installer file for Mac. Then, as soon as you start it, the installer will guide you through the rest
STEP 2 - Install the Expo CLI
We'll install Expo CLI with npm, npm comes along with Node, you can confirm this by running the following command.
npm -v
it will print the version of npm installed in your machine.
Now, we install Expo CLI by running the following command:
npm install -g expo-cli
Install Project
When you download after you need to install all package in package.json
Navigate to the downloaded Good Food folder using terminal and run
npm install
Now the project is all set to go. Navigate into the newly created folder and type in the npm start.
npm startnpm start will now start up the Expo development to the Expo Dev Tools and a new tab should open in your browser.
Create a Firebase Project
Head over to Firebase.com and create a new account. Once logged in, you’ll be able to create a new project in the Firebase Console.
- Create a new account on Firebase.com
- Create a new project in Firebase Console
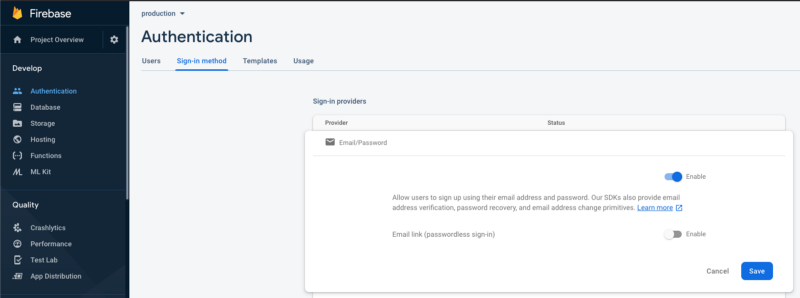
- Enable Email & Password auth method in Firebase Console -> Authentication -> Sign-in method
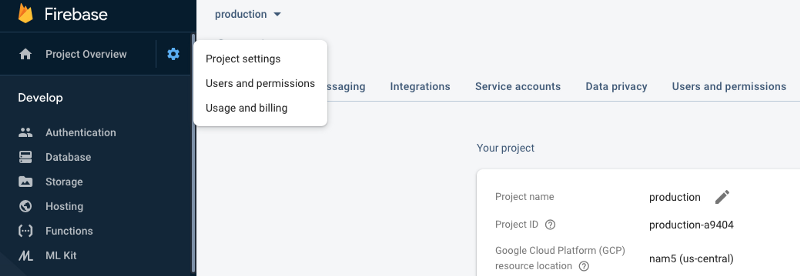
Create a Firebase config file
Add your firebase configuration into firebase/config file:
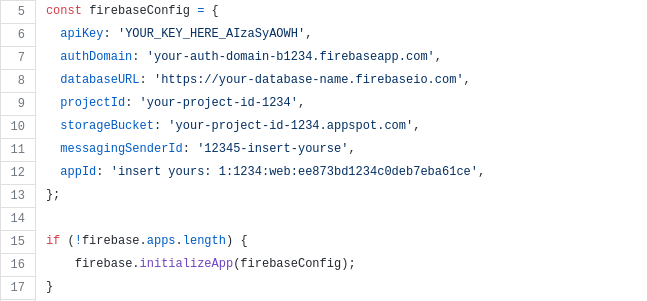
You can get all this information from Firebase Console -> Project Settings
Get Google Places API key
In order to implement autocomplete functionality, we need to get an API for Google Places API.
Go to Google Cloud Platform
Visit Google Cloud Platform console to get an API key to use “Google Maps Javascript API”.
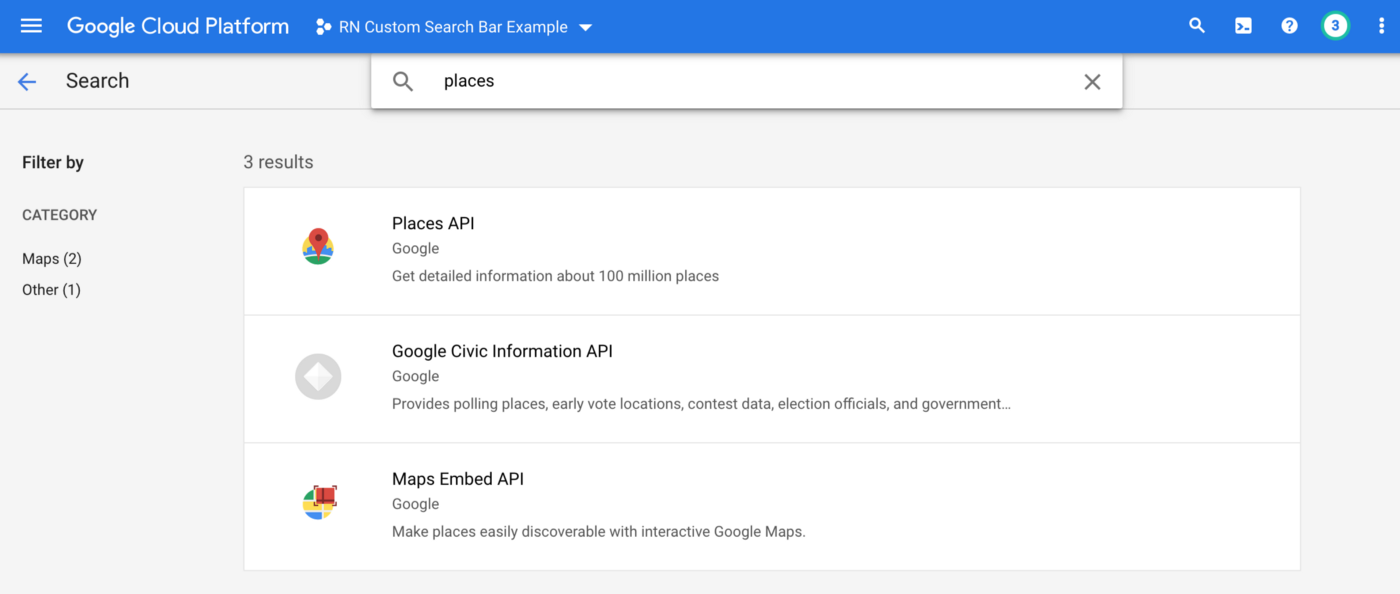
Create a project and enable the API
First, create a new project on the console and navigate to “APIs and Services” on the left drawer navigation. Then, click on “ENABLE APIs AND SERVICES” on the dashboard.

On the next screen, search for “Places API” and enable it.
Generate an API key
After enabling the API, you need to create a key to actually use the API. navigate to “Credentials” under “APIs & Services”, and click on “CREATE CREDENTIALS” in the upper middle of the screen and choose “API key”.
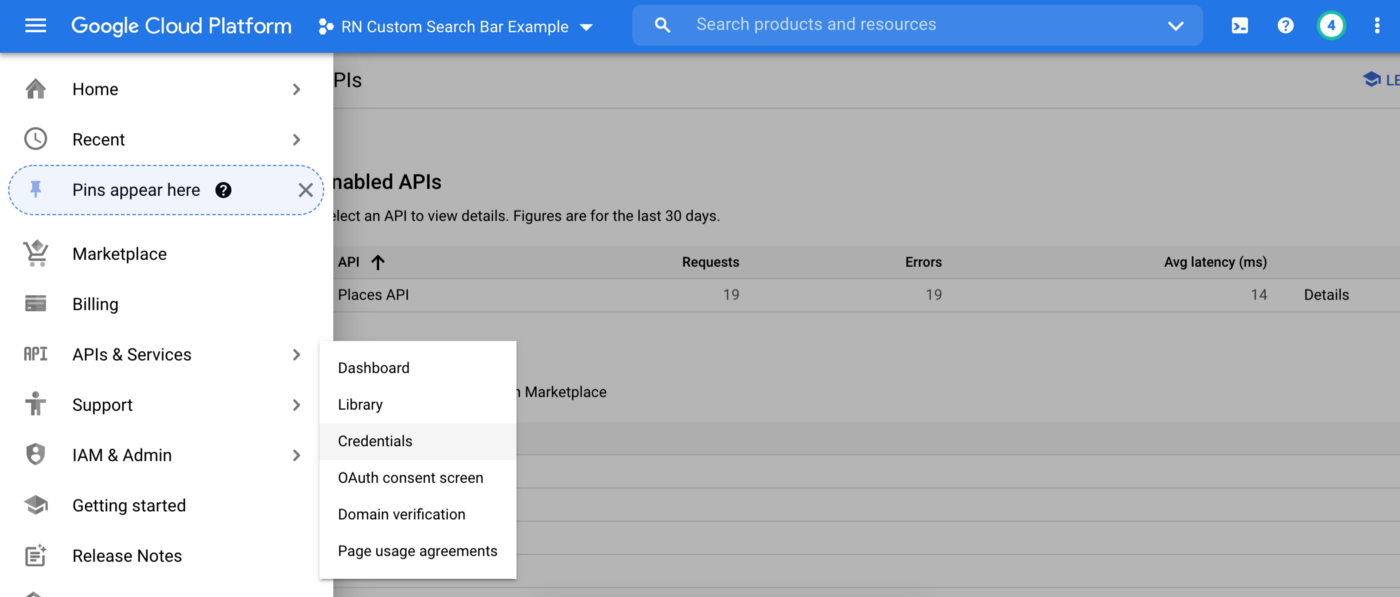
This will generate an API key, so keep it somewhere safe because you need it later to use the API in the app.
Create a billing account and link it to the project
In order to get results from the API, your Google Cloud project need to have a billing account linked to your project. You can create a billing account and link it to your project on the “Billing” page.
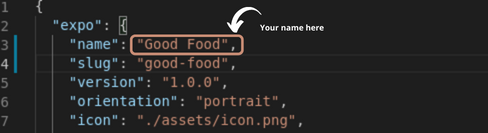
Change app name
It's very easy to change app name, open app.json file in root project folder .
Change app logo
It's very easy to change app logo, open assets folder in root project folder .
Change app currency
It's very easy to change app currency, open assets folder in root project folder .
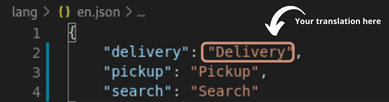
Translation
It's very easy to customizing the experience for specific regions, languages, or cultures. It also provides access to the locale data on the native device.

In en.json file, inside of lang folder, you can translate for your specific language
Screens
| 📦screens |
| ┣ 📜Account Screen |
| ┣ 📜Add Card |
| ┣ 📜Cart Screen |
| ┣ 📜Home |
| ┣ 📜Loader |
| ┣ 📜Menus Detail Screen |
| ┣ 📜Orders Screen |
| ┣ 📜Offers |
| ┣ 📜Onboarding |
| ┣ 📜Order Completed |
| ┣ 📜Order Details |
| ┣ 📜Order Request |
| ┣ 📜Orders History Screen |
| ┣ 📜Restaurant Detail |
| ┣ 📜Restaurants Map Screen |
| ┣ 📜Search Results |
| ┣ 📜Search Screen |
| ┣ 📜Sign In |
| ┣ 📜Sign Up |
| ┣ 📜Splash |
| ┗ 📜Wallet |
Home Screen
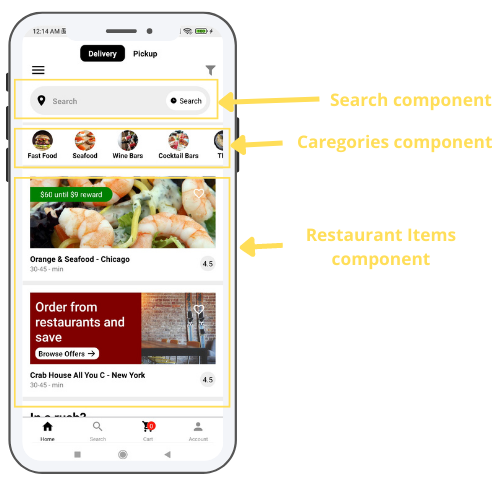
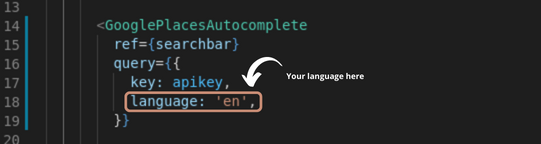
Search Component
You can easily change autocomplete language
Categories Component
You can easily add category , set image, name, description in restaurant app
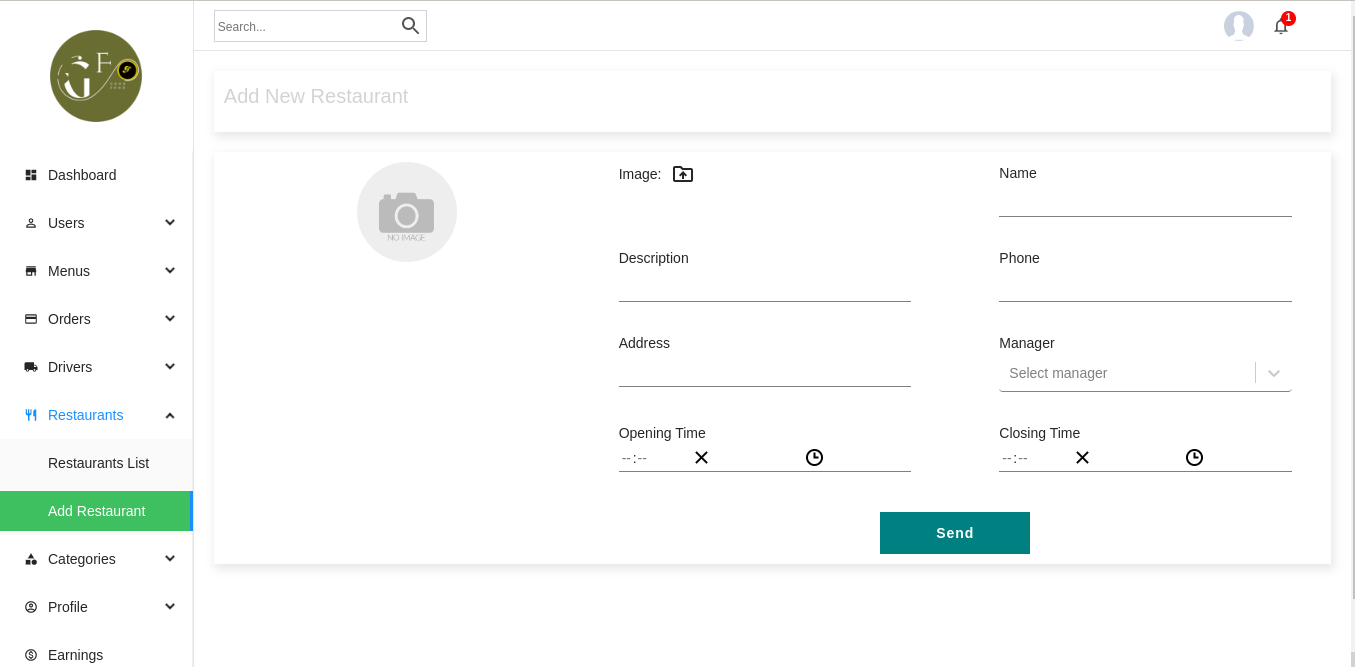
Restaurants Items Component
You can easily add restaurant, set image, name, description, address in admin dashboard
Restaurant Details Screen
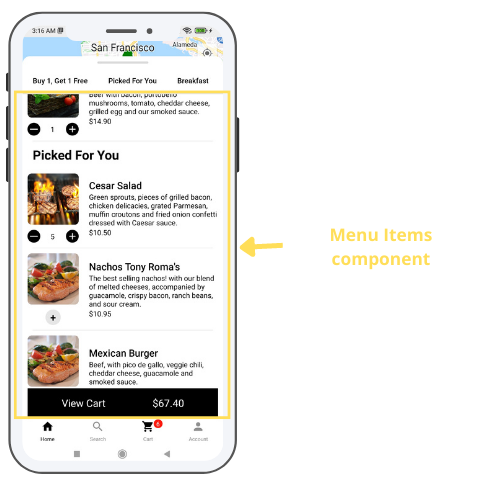
Menu Items Component
You can easily add menu , set image, name, description, price in restaurant app
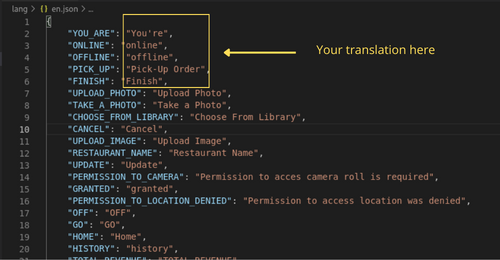
Driver App Translation
It's very easy to customizing the experience for specific regions, languages, or cultures. It also provides access to the locale data on the native device.
In en.json file, inside of lang folder, you can translate for your specific language
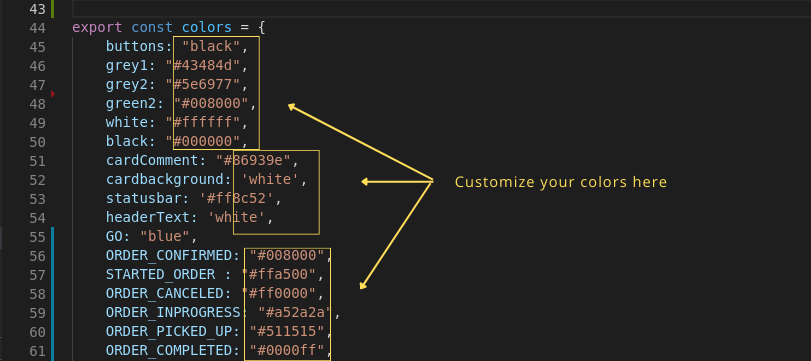
Customize Colors
It's very easy to change colors , open global.js file in project folder .
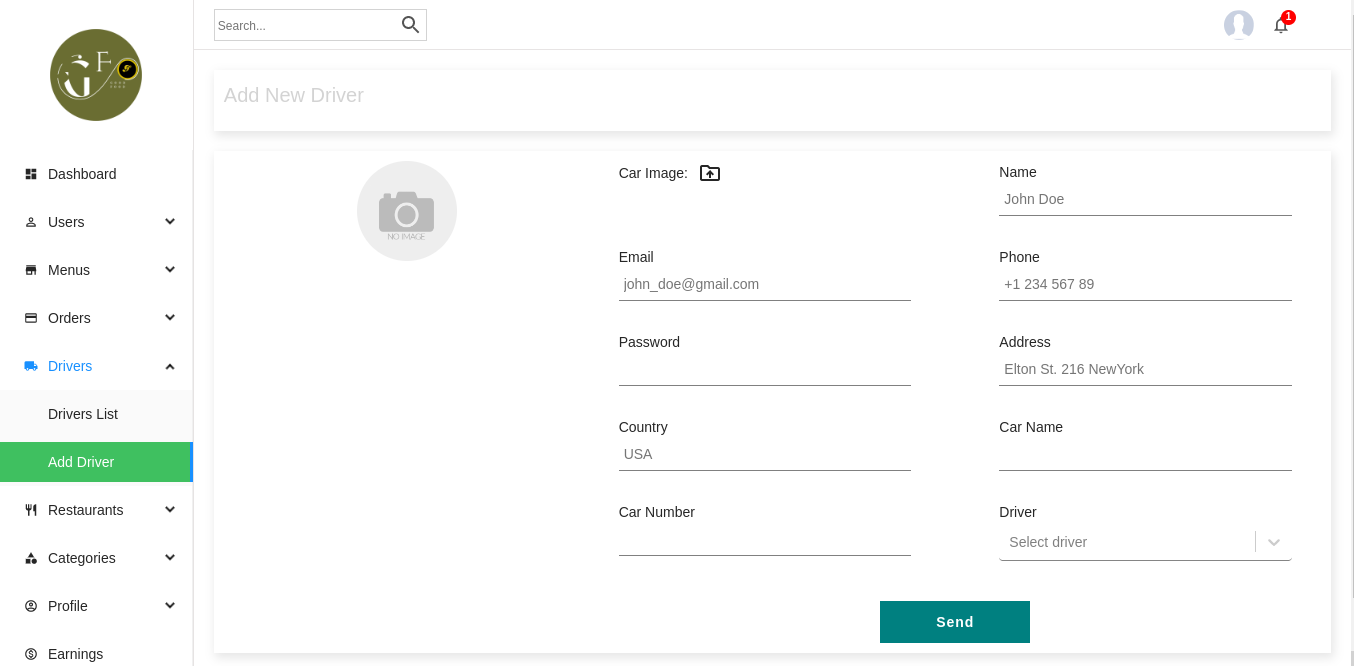
Add New Driver
Add driver in Admin Panel .
Customize Icons
It's very easy to customize icons , open global.js file in project folder .
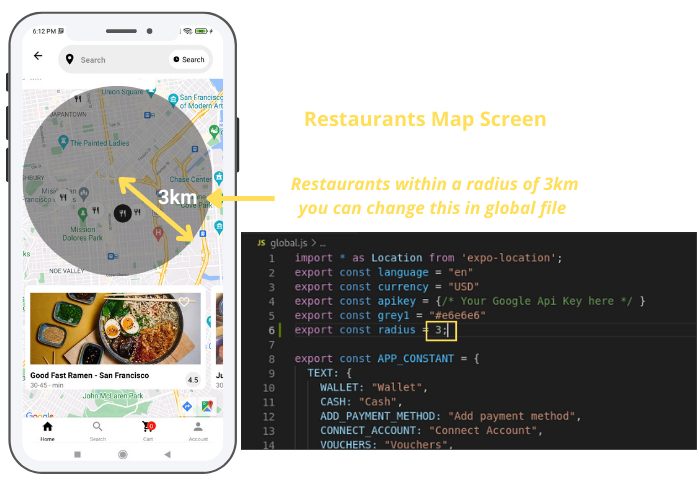
Restaurants Map Screen
Restaurants sliding Component
You can easily change radius around locations
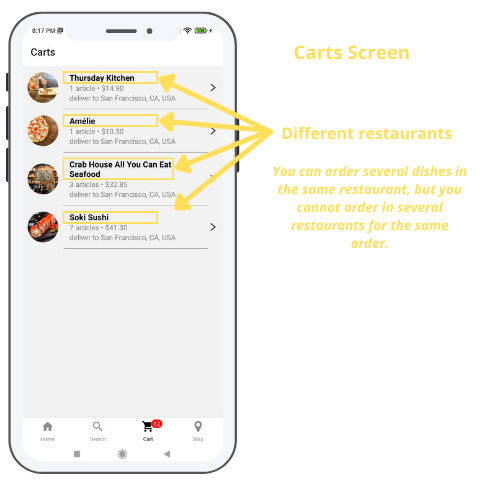
Carts Screen
Driver Notification Time
It's very easy to customizing the driver app, notification when receive order